Shifting Security Left by scanning your container images
It’s been quite some time since I wrote a how-to article. A lot has changed since then with me personally but let’s get right into it.
Anchore Engine is an open-source tool that scans your container images to see if there are any open vulnerabilities.
For example, if your base image is node:alpine how do you know if that image is safe to use? Anchore will scan your built image and let you know if there are vulnerabilities that you can leverage during the build process.
Here’s the breakdown of what we’ll be doing:
⦁ Install Jenkins in our Minikube / Windows 10 setup.
⦁ Install Anchore
⦁ Configure Jenkins plugins
⦁ Set up a freestyle pipeline job to build, push and scan a custom container image
You’ll need:
⦁ A working instance of Minikube
⦁ Helm
⦁ Internet access
⦁ Dockerhub account (optional)
Installing Jenkins on Minikube / Windows 10
Github Repo: https://github.com/airwavetechio/jenkins-demo
Minikube version: v1.15.1
OS: Windows 10 Pro
Production-ready: No
Jenkins: 2.274
First off, you’ll want to clone the repo above. It’s a modified version of the Jenkins Helm chart, broken down to suit our demo needs.
We are going to be building Docker images inside of Jenkins so we’ll have to modify our Minikube node just a bit.
First, you’ll want to ssh into your Minikube instance.
minikube ssh

Next, we are going to ensure our docker user inside Minikube has the same group ID as the jenkins user inside of the Jenkins container we will be deploying. I’ll explain more in a bit why we need to do this, but first, check to see if your docker user’s group ID is 1000
id docker
This varies depending on which driver you are using — this one is using vm-driver=hyperv
If not, run this command to fix it:
sudo groupmod -g 1000 docker

This varies depending on which driver you are using — this one is using vm-driver=docker
Now check the permission of /var/run/docker.sock . We will need to use this for Jenkins so we can build Docker images.
ls -l /var/run/docker.sock
group is 999
If the group is 999, change that to 1000.
sudo chown root:1000 /var/run/docker.sock

The group is now “docker” since we changed the group id to 1000
Finally, we are going to create a directory on the Minikube host to store our Jenkins configurations in case you need to restart things. We will be mounting this to the deployment.
sudo mkdir -p /data/jenkins-home
sudo chown docker:1000 -R /data
ls -l /data
exit

/data/Jenkins-home permissions should look like this
Now navigate to the cloned repo and install some prerequisites like:
– a Jenkins namespace
– RBAC
– persistent volume
– Jenkins configmap
– Jenkins configuration as code
– Jenkins secret
git clone https://github.com/airwavetechio/jenkins-demo
cd jenkins-demo
kubectl apply -f prereqs
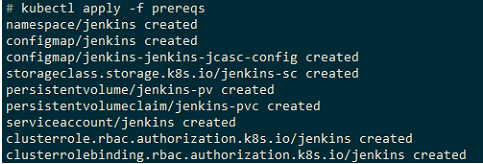
Now you want to install Jenkins itself.
kubectl apply -f deployment.yaml

Our installation comes prepackaged with the plugins you need to complete the demo. If you want to add our own plugins, look in the ./prereqs/jenkins-cm.yaml file and add your plugin within the plugins.txt config.
Jenkins should be up and running in a minute or two, but make sure you validate it.

kubectl get pods -n Jenkins
Install Anchore
Next, let’s install Anchore into your Minikube instance. Using Helm, install Anchore into the default namespace.
helm repo add anchore https://charts.anchore.io
helm install anchore-demo anchore/anchore-engine

A snippet of the Helm installation
Validate the installation

kubectl get deployments
Configure Jenkins plugins
Since we pre-installed plugins along with the Jenkins deployment, we will need to configure them.
Let’s connect to your Jenkins instance
kubectl –namespace jenkins port-forward svc/jenkins 8080:8080

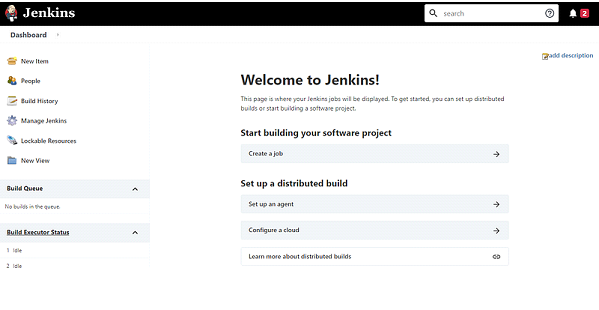
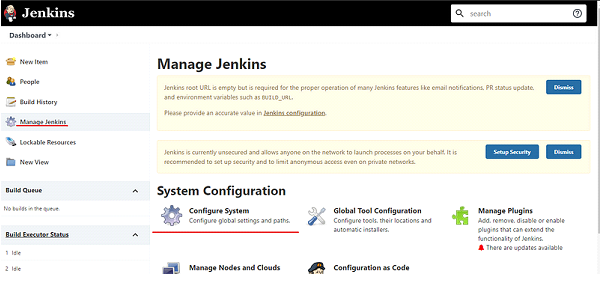
Click on Manage Jenkins > Configure System
This is where we will configure the plugins.
Configure Anchore
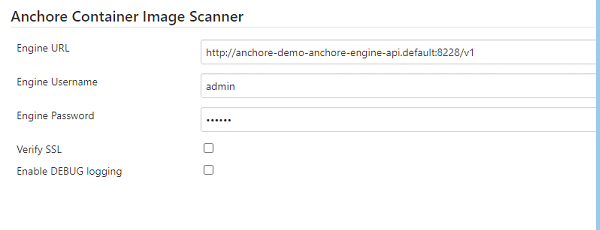
Scroll down to Anchore Container Image Scanner
Engine URL http://anchore-demo-anchore-engine-api.default:8228/v1
– This is the name of the Anchore API service with the namespace.
Engine Username admin
Engine Password foobar
– You can find this from the Anchore secret.
Configure the Docker Builder
Scroll down to Docker Builder and type in unix:///var/run/docker/docker.sock
The changes we made in the Minikube node allow us to connect to the socket. Our custom deployment of Jenkins mounts /var/run from your Minikube node to /var/run/docker within the Jenkins container. Also within the container, the jenkins user’s group ID is 1000, matching the group ID we changed earlier. In other words, we matched the group ID of the jenkins user in the container with the docker user of the Minikube node

Test the connection
Don’t forget to click Save at the bottom.
Set up a freestyle pipeline job to build a custom container image
In this phase, we are going to create a pipeline job to scan a Docker image following this flow.

Clone > Build > Push > Scan
Setting up the Freestyle Job
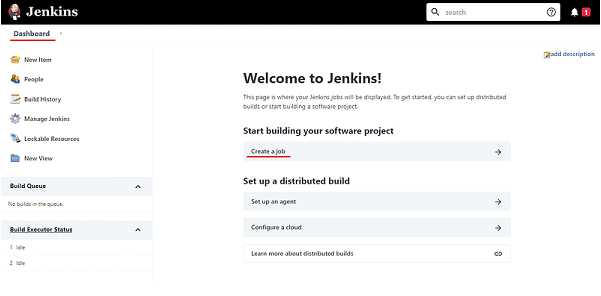
Click on Dashboard > Create a job
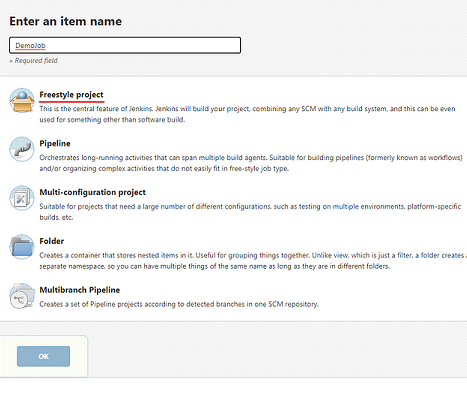
Create a job name with no spaces and click Freestyle project > OK
In this step, we will be cloning a pre-existing GitHub repository.
IF you have followed our guides before, then you might be familiar with this repo. If not, this is our example repo we use to test things, such as deployments. It’s a node app that serves a static page on port 5000.
You can use your own repo if you wish as long as there is a Dockerfile in the repo.
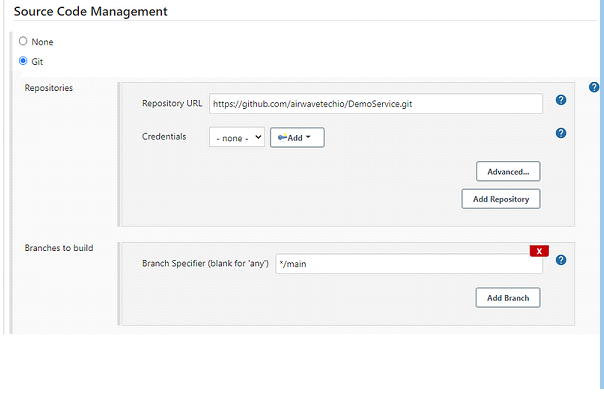
Scroll down to Source Code Management and add this Github URL https://github.com/airwavetechio/DemoService.git
Changes the branch to */main
In this step, we will be building the Docker image from the Dockerfile located in the repo. If you don’t have Docker Hub (or any other registry) access available to you, you can skip the two Execute Docker command build steps (this one and the next one).
Scroll down to Build > Add build step > Execute Docker command
